|
Portaging
There is a wealth of information on gear, food, cooking, canoe routes, first aid, orienteering, and how to paddle a canoe on flatwater or in whitewater. Oddly, there is a lack of information on how to portage a canoe properly. Frustratingly, canoeists I meet usually confirm this conclusion. Even the Ontario Recreational Canoeing Association's (ORCA) course guidelines currently omit description of method. This site's aim is to rectify the situation by describing the method that works best, and explaining why this method works best. Various camps such as Northway-Wendigo in Algonquin Park have traditionally used this method but the original credit goes to our North American Indians. Their way has largely been forgotten. Using their method and improving upon it, I have portaged hundreds of kilometers in my decades of canoeing. Portaging with ease makes tripping the pleasure it should be, and the good places that take effort to get to are yours to visit. Congestion aside, I think as more people visit remote and wonderful places, more people will lobby to protect them. The Wrong Ways
To contrast the true way, consider some wrong ways. Wrong ways all pound or gouge your shoulders and force your arms above your head in zombie fashion. No wonder people hate portages. 1. The two person carry. Unless you cannot carry more than 35lb, sharing a canoe carry is obviously inefficient. Unless the two people are perfectly physically matched and travelling on a flat sidewalk, they will never be in sync with each other. Navigation is difficult and the view consists of someone's rear or the bow of the canoe. 2. Lashing paddles to make a yoke. More of a guillotine than a yoke, when you wipe out. You will wipe out someday...we all do. The lashing shifts around, wastes time setting up, and the canoe will pound your shoulders. 3. The carved yoke. The purpose of a carved wooden yoke is to sell canoes and its job is done once the canoe leaves the showroom. It is not carved for your shoulders, my shoulders, or the shoulders of anyone you know. Even if it were, it would only fit when the canoe is level. Like any yoke, it is designed to pound your shoulders and inflict pain within the first 100 meters. It is also intended to slice into your neck on your way downhill, and slide off going uphill. Your arm is meant to fall asleep as you grasp the gunwhale to keep the canoe in place. At least if you wipe out the canoe will roll off you.  The wrong ways work, but can you carry a canoe and pack 2km "one-shot, non-stop" in as low as 20 minutes? With my way, you can if you choose. After all, weight is not the gating factor, comfort is. The Right Way
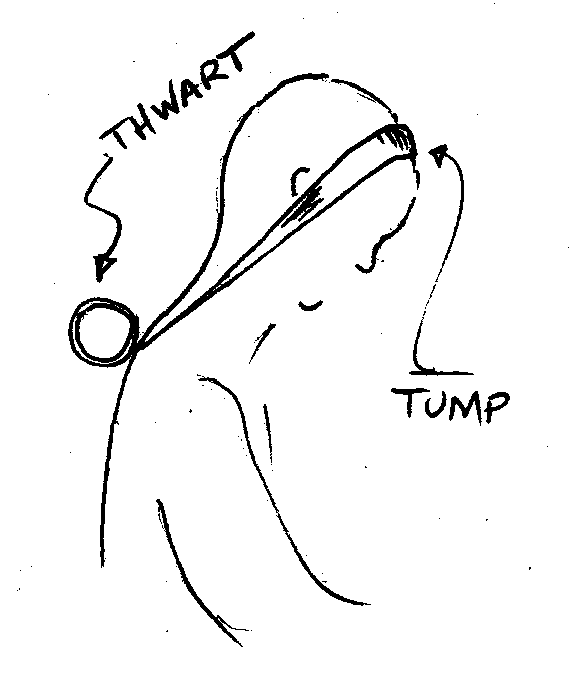
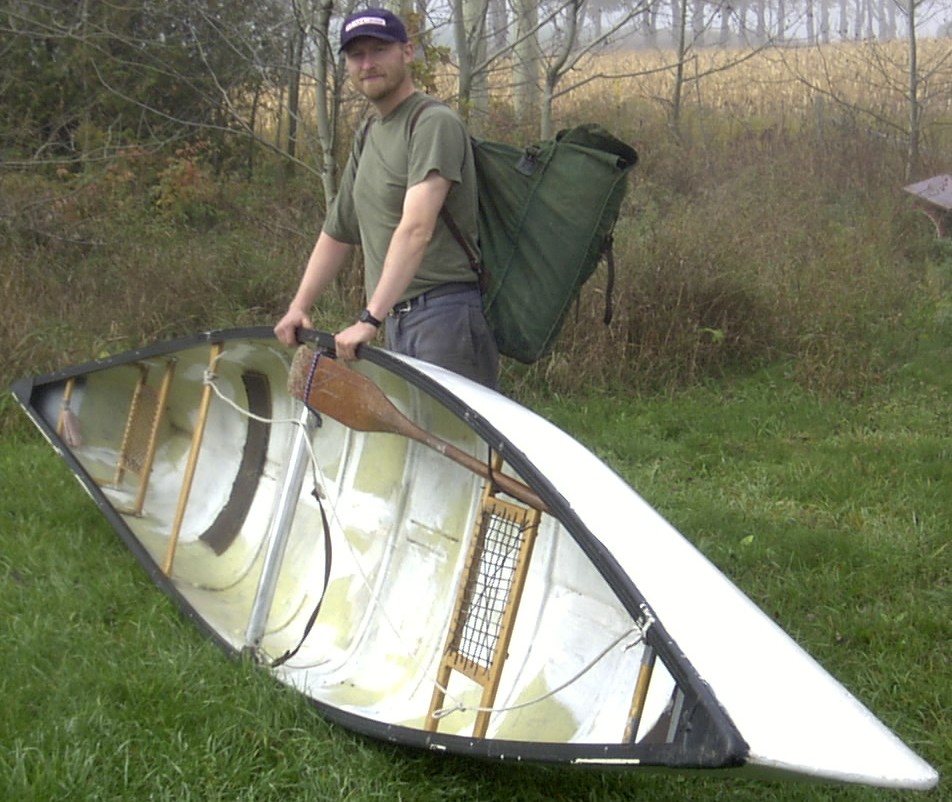
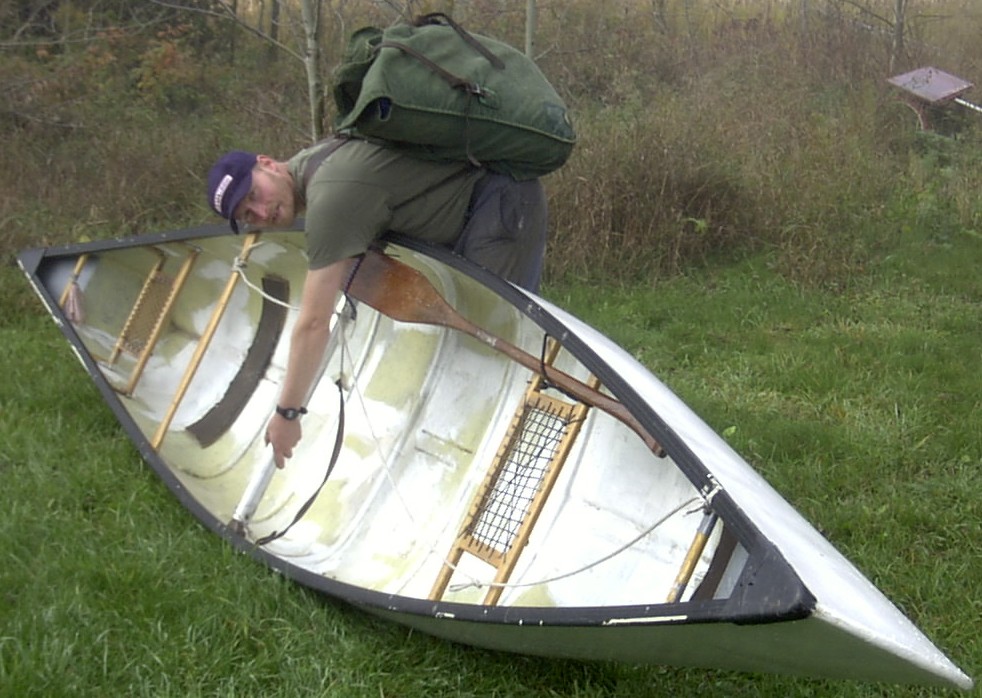
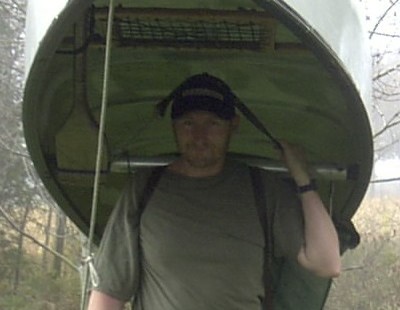
The tump automatically keeps the canoe from sliding off as I climb a hill, and yet the canoe will roll off safely if I fall. Once it is adjusted, it is good for the season. Place the carved wooden yoke on your mantlepiece as sculpture and install a round bar for the centre thwart. I use a 2 inch diameter aluminum tube. It is strong, light, and regardless of the canoe's tilt, the back of my shoulders cannot feel the difference. Whether I am heading up or down, the thwart offers the same blunt feel at all canoe angles and annoying discomfort does not build. You can wrap your thwart in thin foam, but try it without and see what you think. The foam is a drag on wet days or around passengers with muddy boots. Adapt a tube to any canoe. My canoe is balanced so I do
not have to fight to keep the bow from tilting up or down. In a pinch
a small rock in the bow or stern will provide the balance you need.
The added weight is dwarfed by the benefit. The final part of the
method is to tie my painter from the bow to the thwart behind me such
that it hangs to a height I can use as an armrest. If you are right
handed, have it support your right arm. This offers you advantages:
Lightweight cotton gardening gloves from the dollar store are good for sun, bugs, and chafing from clutching the control rope or just paddling all day. Come dinnertime they are good for quickly shifting hot pots too. I often hold on to the tump with my left hand so I can tilt my head up more easily. As a minor point, I attach my tump so it curls over my thwart and towards the bow as shown in the profile sketch, such that when I am carrying, the canoe is balanced but there is the slightest twisting force causing the bow to lift. This also effectively narrows the width of attachment to the thwart which in turn offers a bit more tump contact with my forehead. Most importantly, the strap is, in profile, as parallel to and in line with my neck as possible.
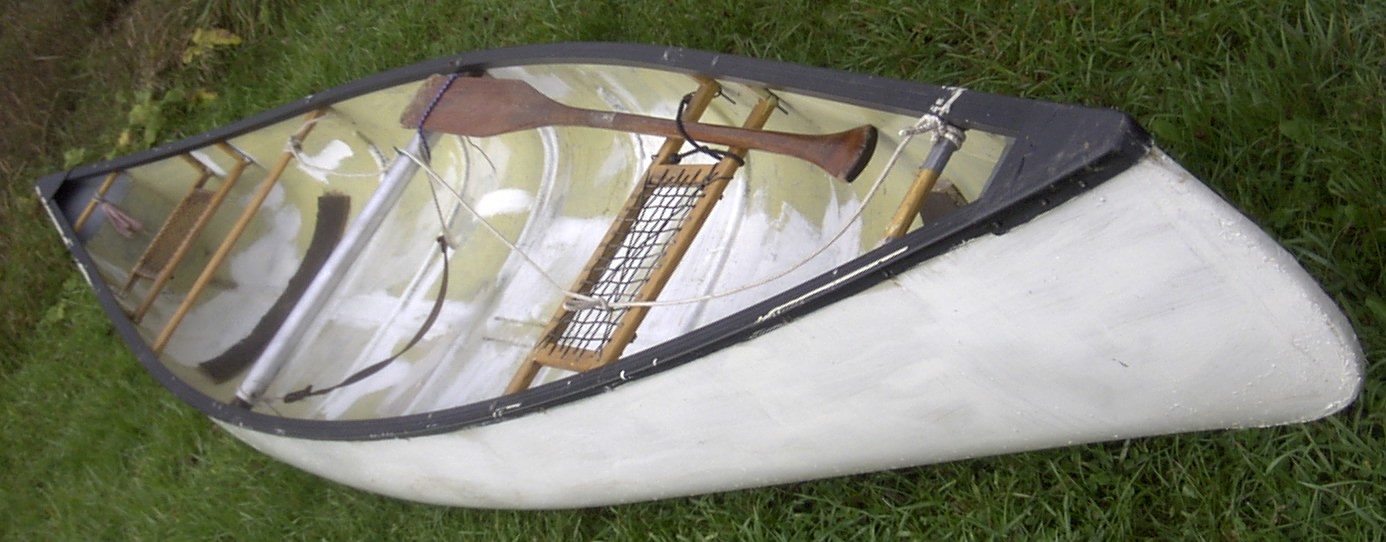
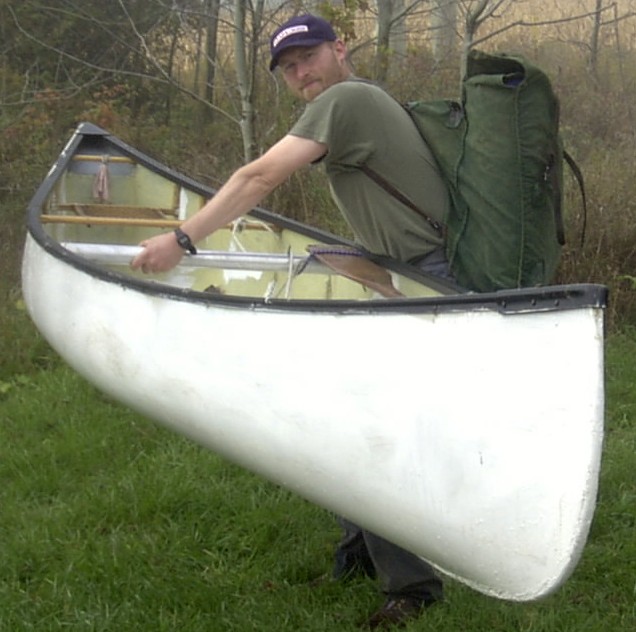
I carry a large canoe pack with no pockets or stuff swinging off it or falling off it. Everything is inside. When tripping solo I stow my paddle inside the canoe so I have only the canoe and a pack or two to carry. Simple. If I stop on a portage for a rest, I find 20 seconds is as good as 2 minutes. If it is a nice spot, I linger longer. Knowing how to roll up your canoe will allow you to stop any time you wish. The roll up also allows you to start portaging no matter how awkward the area is at the shore. The paddle is held by permanent bungy cords. I can launch my canoe in the water before pulling the paddle out of its "holster"
With two people and lots of gear, try the "Trip and a half method"
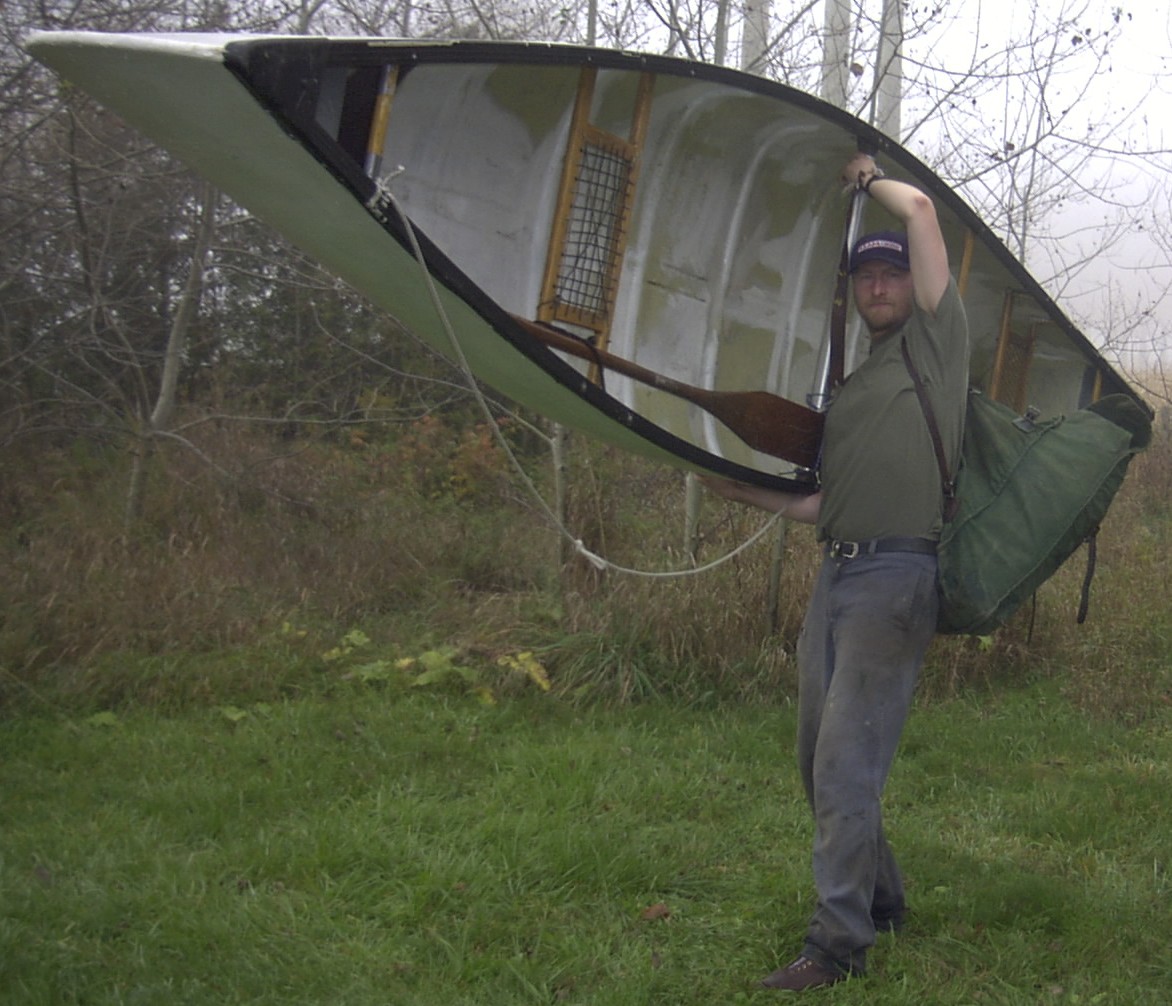
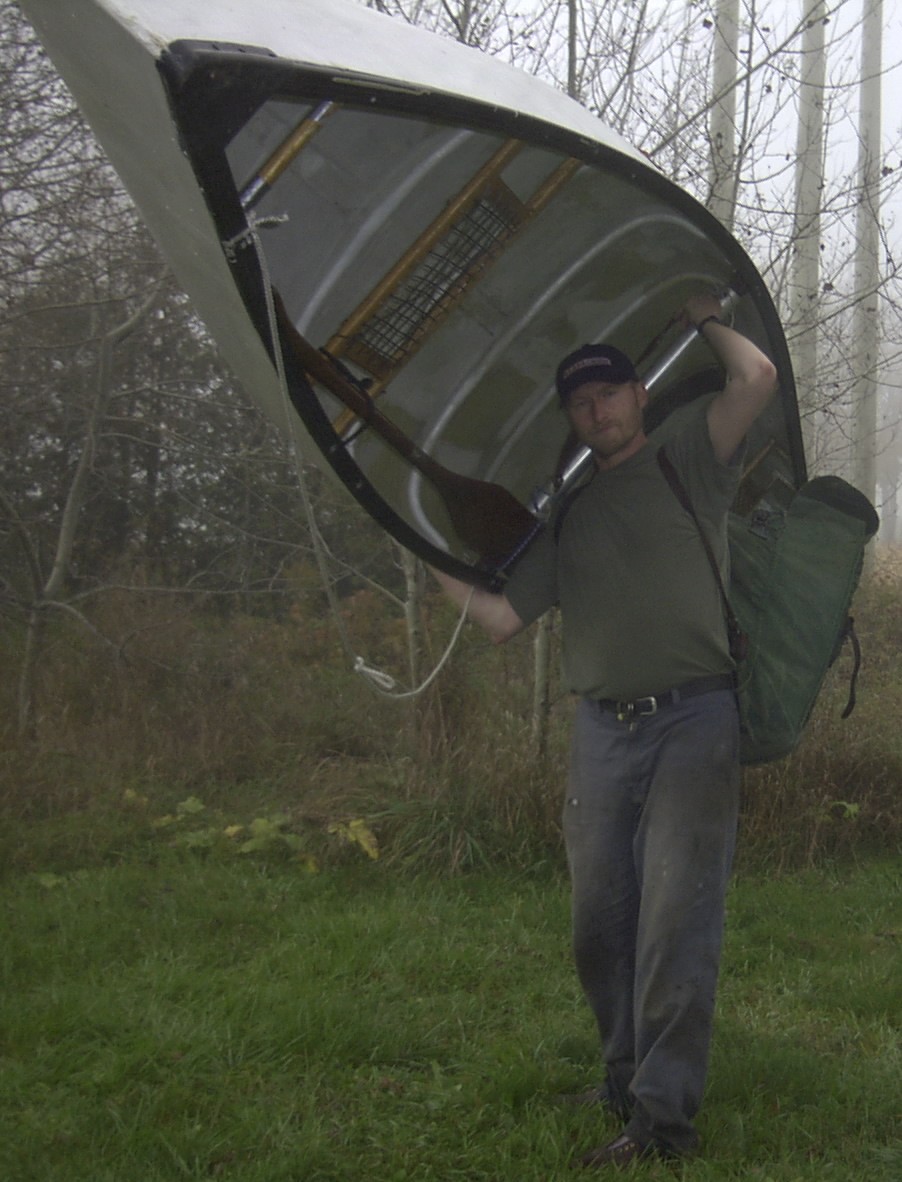
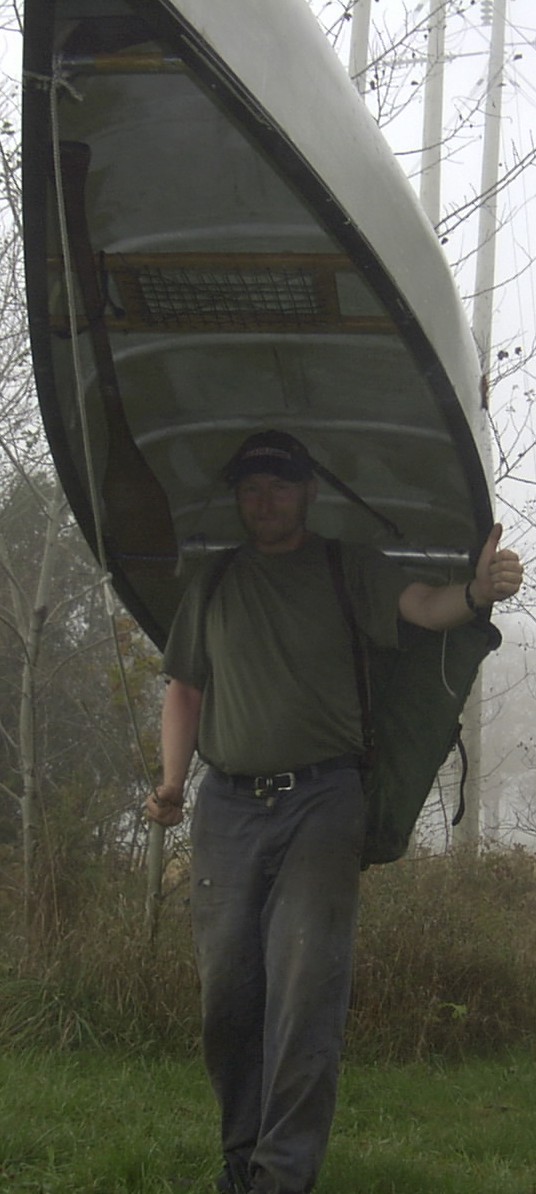
To master the roll up, first imagine the motion involved when you roll down a canoe, and then reverse it. If you don't have long arms and superhero muscles, the trick to rolling up is to rock the canoe on your knee and get the inertia of the canoe working for you in the upper part of the roll. The picture sequence shows how to do it. Stand next to the centre thwart and make sure the tump is dangling toward the bow, and the painter is over the paddle and off to one side. Lift the canoe and cradle it with your right arm while grabbing the opposite gunnel or far end of the thwart with your other hand. Your aim is to eventually be standing, looking to the bow. This means your right shoulder will pivot 90 degrees and your right hand will arc over your head as the canoe flips. When you get good at this you can graduate to rolling while standing on a rock or log on a windy day and then leaping to shore with dry feet! If you succeed, everyone will be impressed. Practice for half an hour. It will become natural. Learn to roll up from from either side.
        In summary, install a tump, install a thick round thwart, install a rope armrest, balance your canoe, and learn to roll up. Aim to cross a portage just once. Adapt the method to fit you, and try it for a day to give it a proper chance. Your neck muscles might ache a bit but they will strengthen quickly. Some say that women are not physically suited to carry a canoe but I don't believe that...I think this method can serve anyone well. Good tripping to all!
^ back to the top ^ |